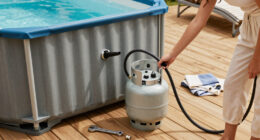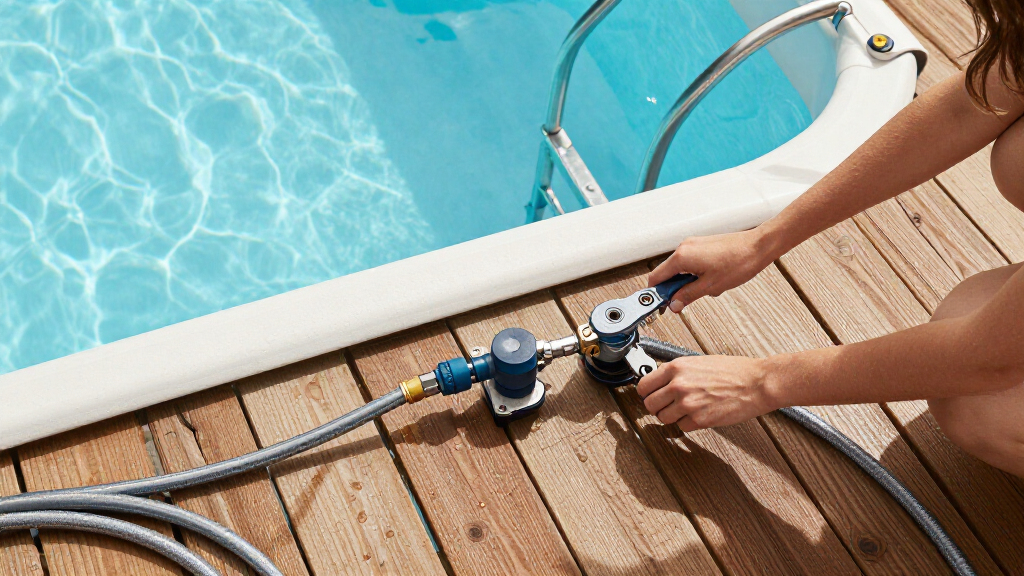

This guide walks you through choosing the right heater, plumbing it into your above ground pool’s circulation system, wiring it safely, and starting it up for the first time. When you finish, your pool will hold a set water temperature automatically, extending your season on both ends. The guide is written for a pool owner with basic DIY plumbing skills who is comfortable cutting and gluing PVC but will hire a licensed electrician for the 240-volt circuit most heaters require. Plan on half a day of plumbing and setup, plus scheduling an electrician. If you are installing a solar heater or a plug-in electric heater under 3 kW, the electrical work may be simpler — those variations are noted where they apply.

Get pool and patio gear delivered free — and shop member deals
- Fast, free delivery on millions of items
- Access to Prime Big Deal Days deals on October 6–7
- Prime Video, Amazon Music and more included

Swimming Pool Heat Pump for Above Ground and Inground Pools (12’x14’x48")
- ✔ Compatibility: Above ground and inground pools (12’x14’x48")
- ✔ Heating Range: 41–104°F
- ✔ Cooling Range: 41–83°F
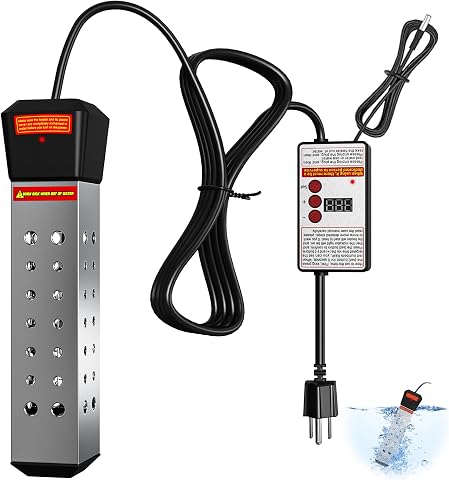
Immersion Water Heater, 2000W Portable Pool Heater with Thermostat & Auto Shut-Off
- ✔ Power: 2000W
- ✔ Voltage: 110V standard outlet
- ✔ Material: Stainless steel heating rods with protective cover

3000W 240V Fully Submersible Pool Heater with Thermostat & GFCI
- ✔ Power: 3000W
- ✔ Voltage: 240V
- ✔ Material: 316 marine-grade stainless steel
Difficulty: Intermediate | Time: 4-8 hours over one or two days (plus professional electrical work)
What You’ll Need
Tools & Materials:
- Pool heater sized for your pool (see Step 1)
- PVC pipe (2-inch schedule 40 typically), elbows, and couplings
- PVC pipe cutter or hacksaw
- PVC primer and cement
- Two hose barb or union fittings matching your filter plumbing (often 1.5-inch or 2-inch)
- Rubber couplings with hose clamps (for hose-based plumbing)
- Check valve and PVC ball valve
- Level and a stable base: concrete pad, paver blocks, or compacted gravel
- Screwdrivers, adjustable wrench, tape measure
- Dedicated 240V electrical circuit installed by a licensed electrician (for heat pumps and gas heaters; some small electric heaters use 120V)
Knowledge:
- How your pool’s pump, filter, and return line are arranged
- Basic PVC measurement, cutting, and solvent gluing
- Understanding of which breaker controls pool equipment
Confirm your heater’s required electrical service before buying. Heat pumps and most gas heaters need a dedicated 240V circuit and hardwiring; a plug-in 120V heater avoids this but heats slowly. Gas heaters also require a natural gas line or propane tank plus a professional hookup in many jurisdictions. This guide focuses on the plumbing and startup sequence, which is the same across heater types.
Swimming Pool Heat Pump for Above Ground and Inground Pools (12’x14’x48")
This heat pump earns our top spot because it’s the only pick in this lineup that addresses what most above ground pool owners actually want: a longer swimming season, not just a warmer afternoon. Its 5.5 COP rating means it moves far more heat into your pool than the electricity it consumes — roughly 70% less consumption than straight electric resistance heating, which is exactly the category both other products in this roundup fall into. Over a full season, that efficiency gap compounds into real savings.The dual-mode heating and cooling function is a genuine differentiator. Compared with the 2000W immersion heater, which can only add heat, this unit can also cool water between 41–83°F — a feature that matters in hot climates where August water turns bath-like. The 38 dB noise level is quieter than a normal conversation, so it won’t dominate a backyard the way some budget heat pumps do. Installation is refreshingly simple for the category: the included adapters get you running in under 10 minutes, with none of the gas-line or complex electrical work traditional heaters demand.The tradeoff is fit specificity. This unit is specced for a 12’x14’x48" pool, so owners of larger above ground pools may find it undersized, and buyers used to the plug-and-play simplicity of the immersion heaters should note that a heat pump is a more permanent fixture rather than something you drop in and remove. The 3-year comprehensive warranty and lifetime technical support help offset that commitment.
Pros:
- 5.5 COP delivers roughly 70% lower energy consumption than electric resistance heating
- Dual-mode operation heats and cools, extending the season by up to six months
- Ultra-quiet 38 dB operation won’t disrupt backyard gatherings
- Under-10-minute installation with included adapters, plus a 3-year warranty
Cons:
- Specced for a specific 12’x14’x48" pool size, which may limit larger setups
- Higher complexity and permanence than a drop-in immersion heater
- Overkill for small inflatable pools or occasional bucket-heating tasks
Best for: Owners of small-to-mid above ground pools who want to swim months earlier and later without brutal electricity bills.
Not ideal for: Owners of larger above ground pools or anyone wanting a cheap, occasional top-up heater for a small inflatable.
Bottom line: If you’re serious about extending your above ground pool season efficiently and quietly, this is the clear pick — nothing else here competes on running cost or season length.
“If you’re serious about extending your above ground pool season efficiently and quietly, this is the clear pick — nothing else here competes on running cost or season length.”
Immersion Water Heater, 2000W Portable Pool Heater with Thermostat & Auto Shut-Off
Sometimes you don’t need a season-long heating strategy — you need warm water in a kiddie pool, an inflatable, or a stock tank tonight. That’s the niche this 2000W portable immersion heater fills, and it fills it for a fraction of what a heat pump costs. Its thermostat with automatic shut-off and auto restart puts it a step above basic immersion rods: set your temperature, and the built-in sensor probe cycles the element on and off automatically, restarting when water cools 15°F below your set point. That’s genuine set-and-forget convenience at a budget price point.Compared with the 3000W submersible further down our list, this unit’s advantages are accessibility and simplicity. It runs on a standard 110V outlet, so there’s no electrical work required, and its UL certification plus stainless steel protective cover make it a safer choice than bargain-bin immersion rods with exposed elements. The tradeoff, of course, is raw power: 2000W warms small volumes quickly, but it will struggle to move the needle in anything beyond a modest above ground pool, and running it nonstop in a large pool would be both slow and expensive relative to the heat pump’s efficiency.The safety rules deserve attention. This heater must be fully submerged before plugging in, must never be touched during operation, and must be unplugged before removal. None of that is unusual for immersion heaters, but it does mean this is a supervised appliance — a very different ownership experience from the fit-and-forget heat pump at the top of our list.
Pros:
- Powerful 2000W element heats small volumes of water quickly
- Thermostat with auto shut-off and auto restart maintains a consistent temperature
- Stainless steel construction with a protective cover for safety
- UL-certified and runs on any standard 110V outlet — no installation
Cons:
- Must be fully submerged before plugging in and unplugged before removal
- Cannot be touched during operation, requiring careful supervised use
- Not powerful enough to meaningfully heat larger above ground pools
Best for: Budget-conscious buyers heating small inflatable pools, bathtubs, buckets, or camping water who want thermostat control without electrical upgrades.
Not ideal for: Anyone heating a full-size above ground pool, or buyers who want unsupervised, walk-away operation.
Bottom line: The smart choice for small-volume heating on a budget — just respect the submersion rules and don’t expect it to heat a full pool.
“The smart choice for small-volume heating on a budget — just respect the submersion rules and don’t expect it to heat a full pool.”
3000W 240V Fully Submersible Pool Heater with Thermostat & GFCI
Positioned between our other two picks, this 3000W submersible heater is what happens when you take the immersion heater concept and engineer it seriously. The headline spec is its ±0.1°C temperature accuracy paired with a real-time LCD display — a level of precision neither the 2000W model’s simpler thermostat nor the heat pump’s ±2°F can match. For hot tub owners or anyone fussy about exact water temperature, that granularity is the selling point.The safety architecture is where this model justifies its premium role. GFCI protection with true grounding is a meaningful upgrade over the 2000W unit’s UL certification alone, providing faster fault detection in the wet, humid environments where these heaters live. The 316 stainless steel construction is also a step up — it’s the marine-grade alloy that resists chlorine and corrosion far better than standard stainless, which matters if you’re leaving the unit in pool water repeatedly. A silicone gasket base protects container floors and improves circulation, a small but thoughtful touch the budget pick lacks.The catch is electrical: this heater requires a 240V circuit, which many homes don’t have conveniently located near the pool. If you’re not prepared to deal with that, the 2000W model on standard 110V is the more practical path. And like all immersion heaters, it must remain fully submerged and shouldn’t be left unattended — so despite its precision, it still can’t match the heat pump’s role as a true whole-season, walk-away heating solution.
Pros:
- ±0.1°C precision temperature control with a real-time LCD display
- GFCI protection and true grounding for safe use in humid environments
- Marine-grade 316 stainless steel construction resists corrosion
- Versatile across pools, hot tubs, ponds, aquariums, and troughs
Cons:
- Requires 240V power that isn’t available at every outlet
- Must remain fully submerged and should not be left unattended while running
- More expensive approach than the 2000W 110V alternative for basic needs
Best for: Buyers with 240V power who want fast, precisely controlled heating for hot tubs, larger containers, or frequent small-pool use.
Not ideal for: Homes without a 240V outlet near the water, or anyone wanting unsupervised whole-season pool heating.
Bottom line: The most refined immersion option here — buy it if you have 240V power and value precision; skip it if a standard outlet is your only option.
“The most refined immersion option here — buy it if you have 240V power and value precision; skip it if a standard outlet is your only option.”
As an Amazon Associate we earn from qualifying purchases.
Before You Start
Turn off the pool pump and its breaker before touching any plumbing. Never run a heater without water flowing through it — dry firing destroys the element or heat exchanger and voids most warranties. Check local code requirements first: many areas require heaters to be installed by or inspected by a licensed professional, especially gas units, and require a certain clearance from the pool edge (commonly 5 feet for electrical equipment) and from property lines. Finally, place the heater on a level, drained, stable base — never directly on dirt or grass.
Step-by-Step Instructions
Step 1: Size the heater to your pool
Calculate your pool’s gallon volume (length × width × average depth × 7.5 for rectangular; × 5.9 for round). As a rule of thumb for above ground pools, an electric resistance heater needs roughly 10–15 kW for a 24-foot round pool, a gas heater should be 100,000–150,000 BTU for fast heating, and a heat pump should be rated for at least your pool’s surface area in the climate where you live. Match the heater’s BTU or kW output to your pool size and your goals: gas heats fastest, heat pumps are cheapest to run in warm climates, and solar mats cost almost nothing but only work on sunny days.
Tip: Oversizing a gas heater slightly is fine; undersizing any heater is the number one cause of disappointment. If your pool is 21 feet round or larger and you want a 10–15°F lift, don’t buy the smallest unit available.
Check: The heater’s rated output matches or exceeds the recommendation for your pool’s gallonage in the manufacturer’s sizing chart.
Step 2: Choose and prepare the heater location
Set the heater on a level pad at least 5 feet from the pool wall where codes require it, close enough to the equipment pad to keep plumbing runs short. For heat pumps, leave the clearances listed on the unit’s label (typically 24 inches on the air-intake side and 12–24 inches elsewhere) so airflow isn’t blocked. For gas heaters, position the vent so exhaust blows away from the house, pool, and any windows. Level the pad with a spirit level in both directions.
Tip: Keep the heater lower than the pool’s water line where possible, and never in a spot where rainwater pools.
Check: The heater sits level, stable, with required clearances open on all sides.
Step 3: Cut into the return line after the filter
Turn off the pump and close any valves. Cut the return pipe (the line running from the filter to the pool wall return) at a point where the heater can be plumbed in-line. Water must flow out of the filter, through the heater, and back to the pool — never the reverse. Dry-fit all fittings before gluing anything.
Tip: Heater inlet and outlet ports are labeled and are often not reversible. Connecting them backwards causes poor heating and can damage internal sensors.
Check: With fittings dry-fitted, water would travel filter → heater inlet → heater outlet → pool return.
Step 4: Install the plumbing with unions and a check valve
Install a union fitting on both the heater inlet and outlet so the unit can be removed for service without cutting pipe. Add a check valve on the inlet side (between filter and heater if you use chlorine, so off-gassing doesn’t corrode the heater) and a ball valve to allow bypass if you plumb one in. Measure, cut, prime, and cement each joint: apply primer to both surfaces, then cement, then push together with a quarter twist and hold for 15 seconds. Support long pipe runs with hangers or blocks.
Tip: For hose-based systems (common on smaller above ground pools), use rubber couplings with stainless clamps instead of glued PVC — this makes winterizing far easier.
Check: All joints are fully seated, no primer missed, and the unions hand-tighten snugly.
Step 5: Connect the electrical supply
Have a licensed electrician run the dedicated circuit specified on the heater’s data plate, bond the heater to the pool bonding grid, and install the required disconnect within sight of the unit. Plug-in 120V heaters should go into a GFCI-protected outlet at least 10 feet from the pool. Do not attempt 240V hardwiring yourself unless you are qualified — this is the step where DIY installs fail inspection and create shock hazards.
Tip: Bonding (the bare copper wire connecting the heater to the pump and pool frame) is separate from grounding and is required by code in most areas.
Check: The electrician confirms the circuit, disconnect, and bonding pass inspection; the heater’s display powers up when the breaker is switched on.
Step 6: Fill the lines and check for leaks
Open all valves, switch the pump on, and let water circulate through the heater for several minutes with the heater still off. Watch every glued joint, union, and the heater’s drain plug for drips. Tighten unions a quarter turn or re-clamp couplings where you see any seepage. Let the pump run a full cycle before heating.
Check: After 10 minutes of running, all joints are dry and the pump basket shows a full, solid stream with no air bubbles.
Step 7: Start the heater and set the target temperature
Confirm the pump is running, then switch the heater to ON and set your desired water temperature (78–82°F is typical). For gas heaters, verify the gas supply valve is open and follow the unit’s lighting/startup procedure. The heater should ignite or engage within a minute, and the outlet pipe should feel noticeably warmer than the inlet pipe within a few minutes.
Tip: Never start the heater with the pump off. If your heater has a flow sensor, it will refuse to fire without adequate water flow — that’s a safety feature, not a fault.
Check: The heater runs without error codes, and the return jet into the pool feels warmer than the pool water within 10–15 minutes.
Step 8: Verify temperature rise over a full cycle
Run the system for 2–4 hours and record the temperature increase. A correctly sized heater should raise a typical above ground pool 1–3°F per hour (gas on the high end, heat pumps and electric on the lower end). Adjust the thermostat to hold temperature rather than swinging it, and set a timer or the heater’s built-in schedule so it doesn’t run continuously.
Check: Water temperature climbs steadily and the heater cycles off once the set point is reached, then back on as it cools.
Common Mistakes to Avoid
- Undersizing the heater for the pool volume — Check the manufacturer’s sizing chart against your actual gallonage before purchase, and buy one size up if you heat in cool weather or want fast recovery.
- Running the heater with no or low water flow — Always start the pump first and wait for a full flow before switching the heater on; clean your filter before heating season so flow stays adequate.
- Plumbing the heater inlet and outlet backwards — Trace water direction from filter to pool return before gluing, and match the labeled IN and OUT ports during dry-fitting.
- Skipping the check valve with a chlorinated system — Install a check valve between the filter and heater inlet so concentrated chlorinated water can’t back-feed into the heat exchanger when the pump stops.
Troubleshooting
Problem: Heater won’t ignite or engage at all
Solution: Confirm the pump is running and the filter is clean (low flow locks most heaters out), check that the breaker and disconnect are on, and verify gas supply for gas units. If an error code shows, look it up in the manual before calling support.
Problem: Heater runs but water barely warms
Solution: Check that a bypass valve isn’t sending water around the heater, verify the heater is sized for your pool, and confirm you’re not fighting a solar cover-less pool losing heat overnight. A pool cover multiplies heater effectiveness dramatically.
Problem: Leak at a glued PVC joint
Solution: Cut out the bad joint and replace it with a coupling — solvent welds can’t be patched reliably. Let new glue cure 2–4 hours before pressurizing.
Problem: Heat pump runs but blows cold air and heats poorly
Solution: Check outside air temperature: most heat pumps lose output below 50°F and some shut off near 45°F. Clear debris from the evaporator coil and confirm side clearances aren’t blocked by a wall or fence.
What Success Looks Like
Your installation is complete when the pump circulates water with zero leaks at any joint, the heater fires and runs without error codes, the return jet feels warmer than the pool within 15 minutes, and the water temperature rises 1–3°F per hour toward your set point. The heater should then cycle off at the target temperature and restart as the water cools, holding temperature automatically. If a gas unit was installed, you also have a passed inspection sticker or sign-off for the gas connection.
Next Steps
Buy a solar cover and use it whenever the pool isn’t in use — it cuts heat loss by 50–70% and can halve your running costs. Clean the filter weekly during heating season, since flow restrictions lock out the heater. For heat pumps, hose dust and pollen off the coil monthly. Before winter, drain the heater per the manual, blow out the plumbing, and close the gas valve or switch off the breaker. Re-check all unions and the check valve each spring before first startup, and schedule a professional service on gas heaters every 2–3 years to inspect the burner and heat exchanger.
Frequently Asked Questions
What type of heater is best for an above ground pool?
It depends on your climate and budget. Gas heaters heat fastest and work in any weather but cost the most to run. Heat pumps are very efficient but only perform well above roughly 50°F air temperature. Electric resistance heaters are cheap to buy but slow and costly to run, and solar mat heaters are nearly free to operate but need sunny weather and roof or rack space.
How much does it cost to run a heater on an above ground pool?
Expect roughly $100–$300 per month for a gas heater used daily, $50–$150 per month for a heat pump in warm climates, and $3–$10 per day for electric resistance heaters. A solar cover typically reduces these figures by half or more.
Can I install the heater myself or do I need a professional?
You can usually do the plumbing, pad, and placement yourself. The electrical connection for 240V units should be done by a licensed electrician, and gas lines should be connected by a qualified installer. Many jurisdictions also require permits and inspection for these connections.
Where should the heater sit relative to the pool?
On a level pad within reach of the equipment plumbing, keeping electrical components at least 5 feet from the pool wall (per most codes), with the manufacturer’s stated clearances open for airflow, and with any exhaust vent directed away from people and buildings.
Do I need a bypass valve on the heater?
It’s recommended. A bypass lets you send water straight to the pool when you’re not heating, reducing wear and flow resistance, and it makes winterizing and heater removal much easier.
Fall Picks
fall essentials
As an affiliate, we earn on qualifying purchases.